Follow these simple steps to integrate the Reviewer.ly plugin into your Open Journal Systems (OJS) workflow.
1. Get the plugin ZIP file
Reach out to us directly and we’ll send you the correct version of the Reviewer.ly plugin for your OJS installation, along with the credentials you’ll need to get started.
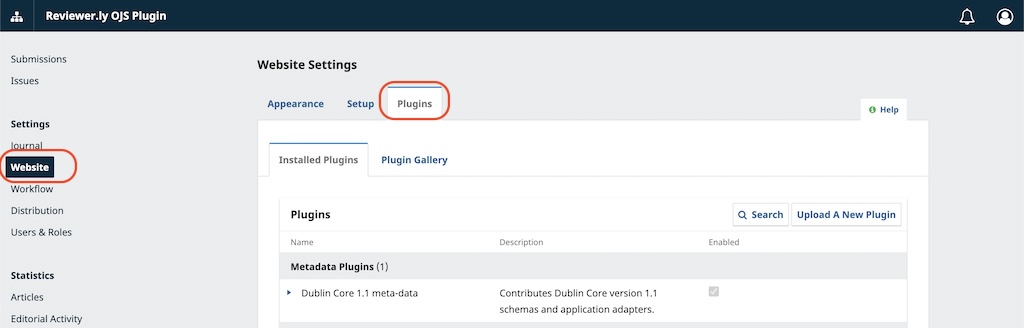
2. Go to the journal’s Plugin page
In your journal dashboard, click on “Website” in the left side-bar menu. From there, select the Plugins tab to view the list of Installed Plugins.
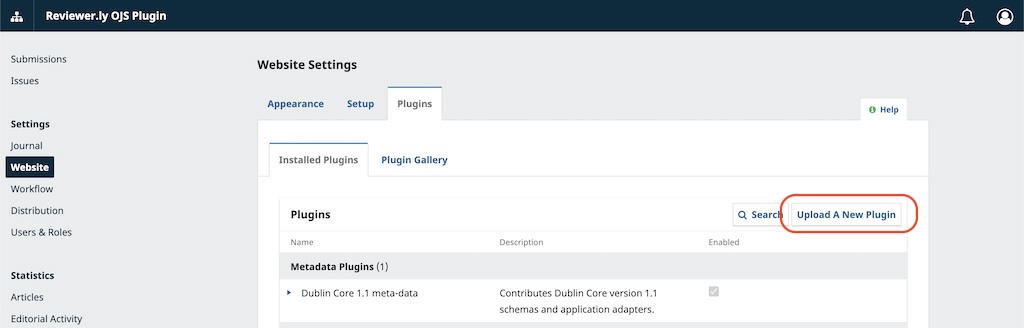
3. Upload the Reviewer.ly plugin
Click the “Upload a New Plugin” button in the top-right corner of the Installed Plugins tab. If you don’t see this option, you may need admin permissions. Contact your journal’s web administrator if needed.
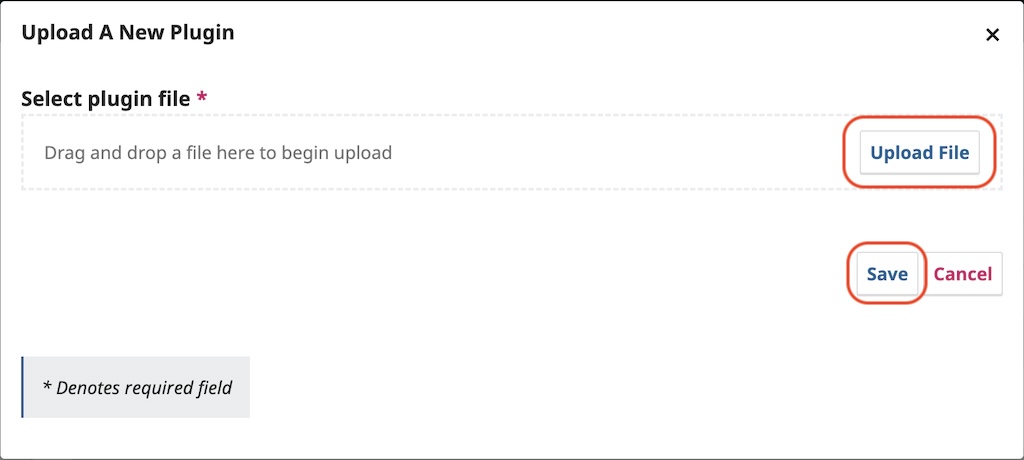
In the upload dialog, click “Upload File”, select the ZIP file we provided (leave it unzipped), and click the “Save” button in the bottom-right corner.
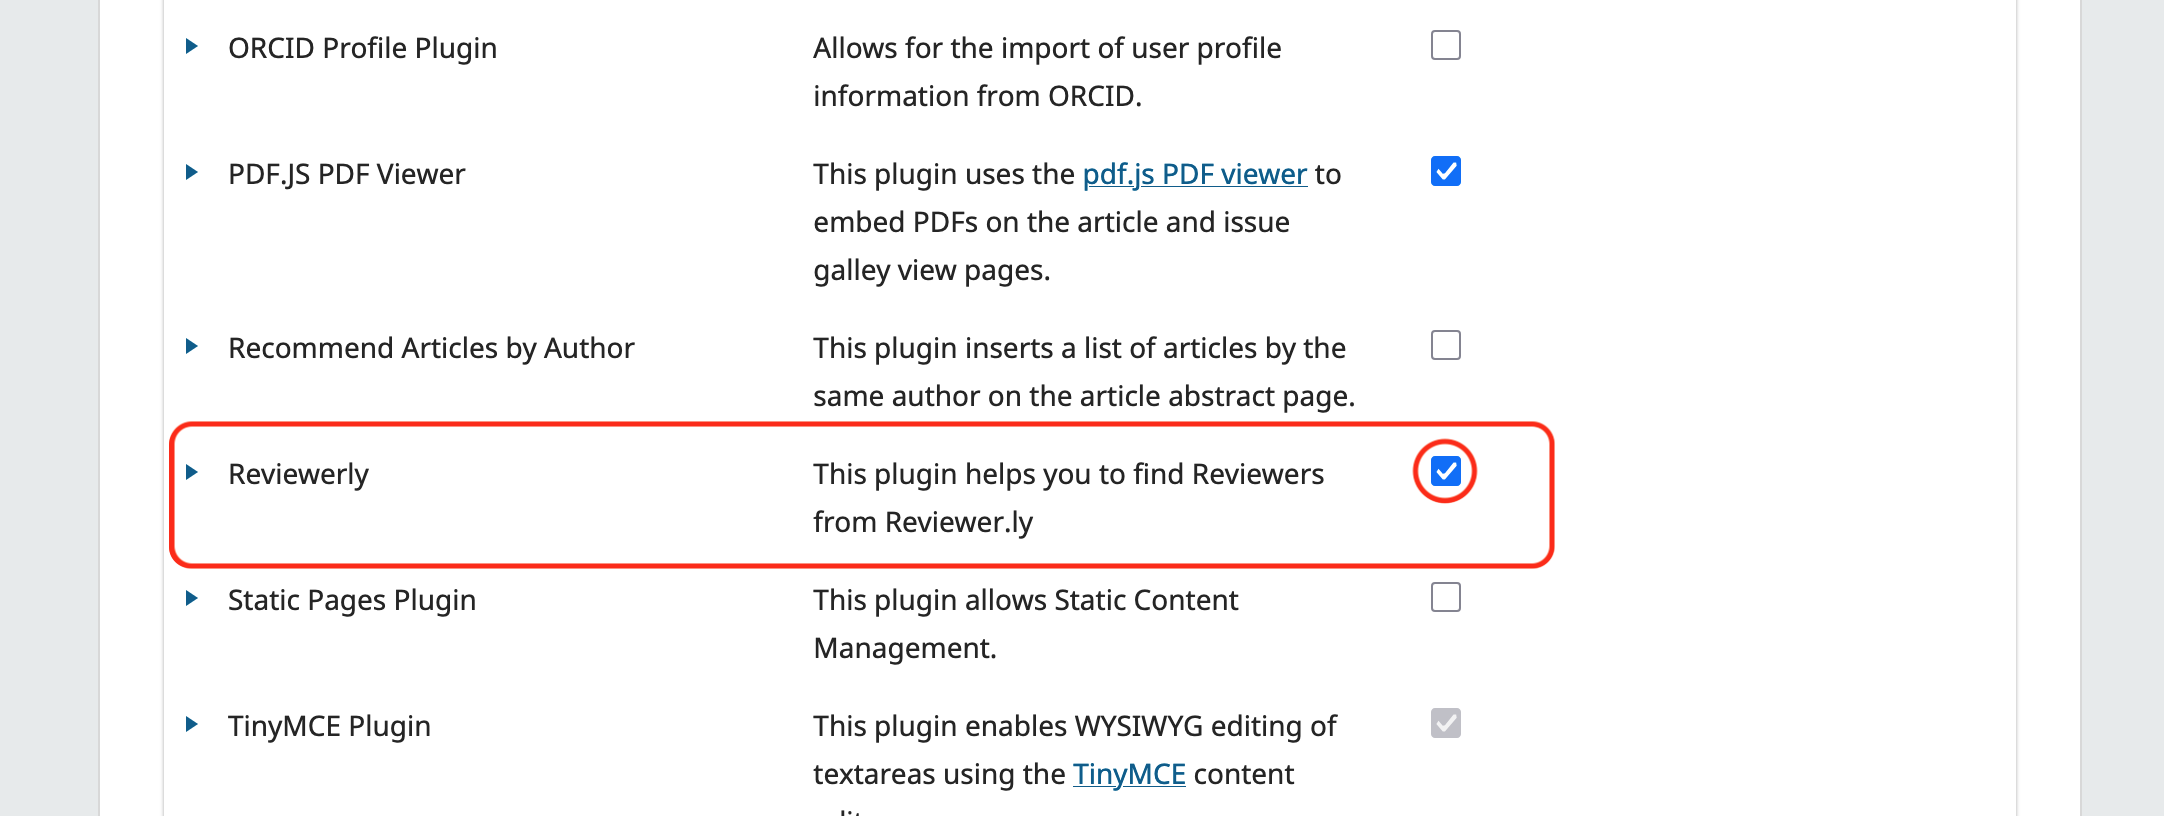
4. Enable the plugin
Once installed, Reviewer.ly will appear in your list of plugins. Check the box on the right to enable it.
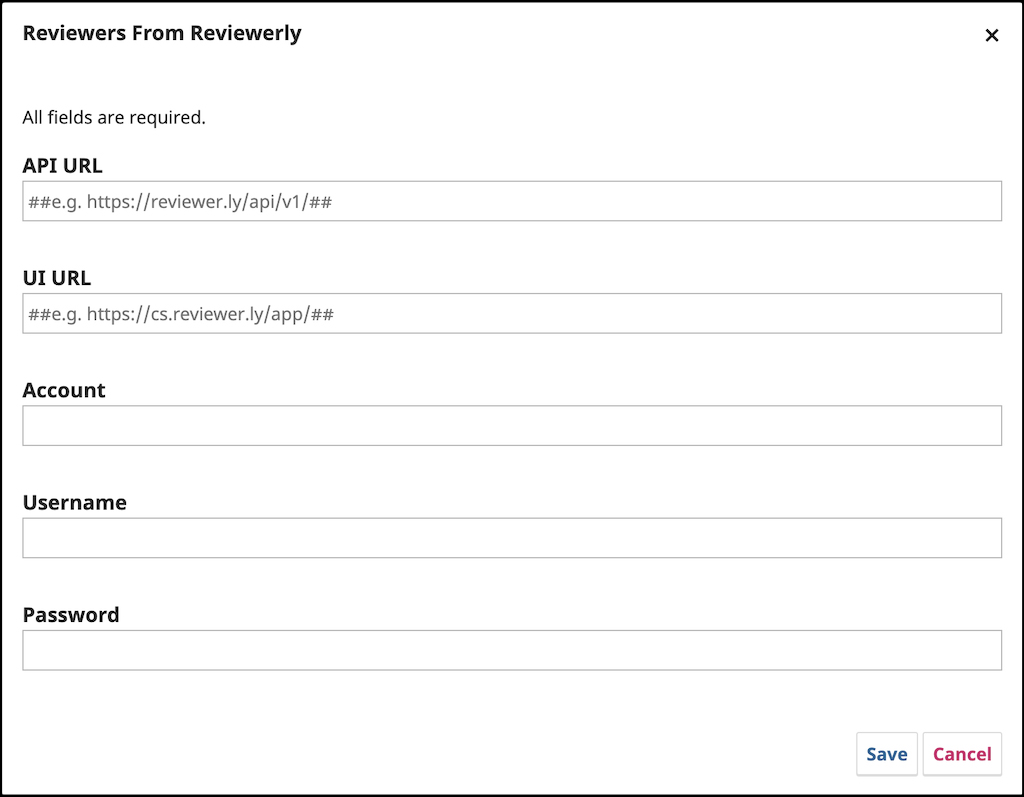
5. Configure plugin settings
For the plugin to function, you must enter specific information, including your credentials, in the settings dialog. Click on the arrow next to Reviewers From Reviewerly to open the plugin settings. Enter the credentials provided and any required information carefully to ensure everything runs smoothly.
You’re all set. Reviewer.ly is now part of your submission workflow, helping you quickly find well-matched, qualified reviewers. Learn how to use the plugin.